Monday, February 6, 2012

Conversation Heart Jewelry

It's Valentine's time and everyone needs a little bling.  If you can't afford diamonds and rubies but want to show your love for this LOVE-ly holiday, why not do-it-yourself with a confectionary take on a traditional Valentine's Day gift?  You don't even have to give it as a gift, but keep it for yourself!  Actually, you'll probably have enough for you and several friends with this easy to make Valentine's Day craft idea!

Making conversation heart jewelry proved to be a fun, inexpensive, and cute do-it-yourself craft with little preliminary set up work.  It was easy to find the supplies, and left had plenty of left over supplies for future craft ideas, or gives you enough to do many sets.  So far I have no breaks or mishaps to have to fix later. 

We made conversation heart necklaces, bracelets, and two kinds of earrings!


I never liked the taste of conversation hearts, but love the way they look.  I was, however, a fan of the candy necklaces and bracelets I used to get when I was a kid.  Nothing beat getting a candy necklace and getting on swing set chewin' on your necklace and not having to use any hands!  You could swing hard and hands-free while enjoying some candy!!  Awesome.  Plus the cool pastel colors looked pretty.

Well, you won't want to eat these candies because they're sprayed with a varnish.  Hey, you don't want them to melt on your neck do you? 

This is a fun craft that requires little preparation before the fun stuff......well that is if you have your friend's husband nice enough to drill the holes in the conversation hearts for you and spray them with Mod Podge so all you have to do is thread things and put them together!  Thanks, Robbie!!!! 


It's so easy, all you need is:

A bag or two of conversation hearts (we used Brach's and they stayed together well while drilling, about $3)
Can of Mod Podge (found at Wal Mart in the craft aisle, about $5.97)


Various jewelry making supplies, (also at Wal Mart in the craft aisle, around $2 each)
-stretchy clear cord (in a spool)
-silver beading wire thread (also on a spool)
-earring hoops
-fish hook earring wire
-crimp beads clamps


This was entirely a group effort with my friend Beth who knew about jewelry making and helped me choose the supplies I needed.  Trinidy had lots of great ideas, such as figuring out that we should drill the holes in the conversation hearts BEFORE spraying them with Mod Podge so that the seal on the inside too.  Well, actually it was HER idea to spray them anyway!  So when you get caught in the rain and maybe your jewelry doesn't melt, you can thank her!  And of course Trin's husband Rob for doing the drilling and spraying. 

What did I do you might ask?  Well......I had fun!  And I came up with the conversation heart jewelry and apologize in advance if it doesn't work out too well.  I have only had mine for a day and haven't worn them yet......but since you're not going to wear them year-round I'm hoping it will last enough to enjoy them for Valentine's Day!

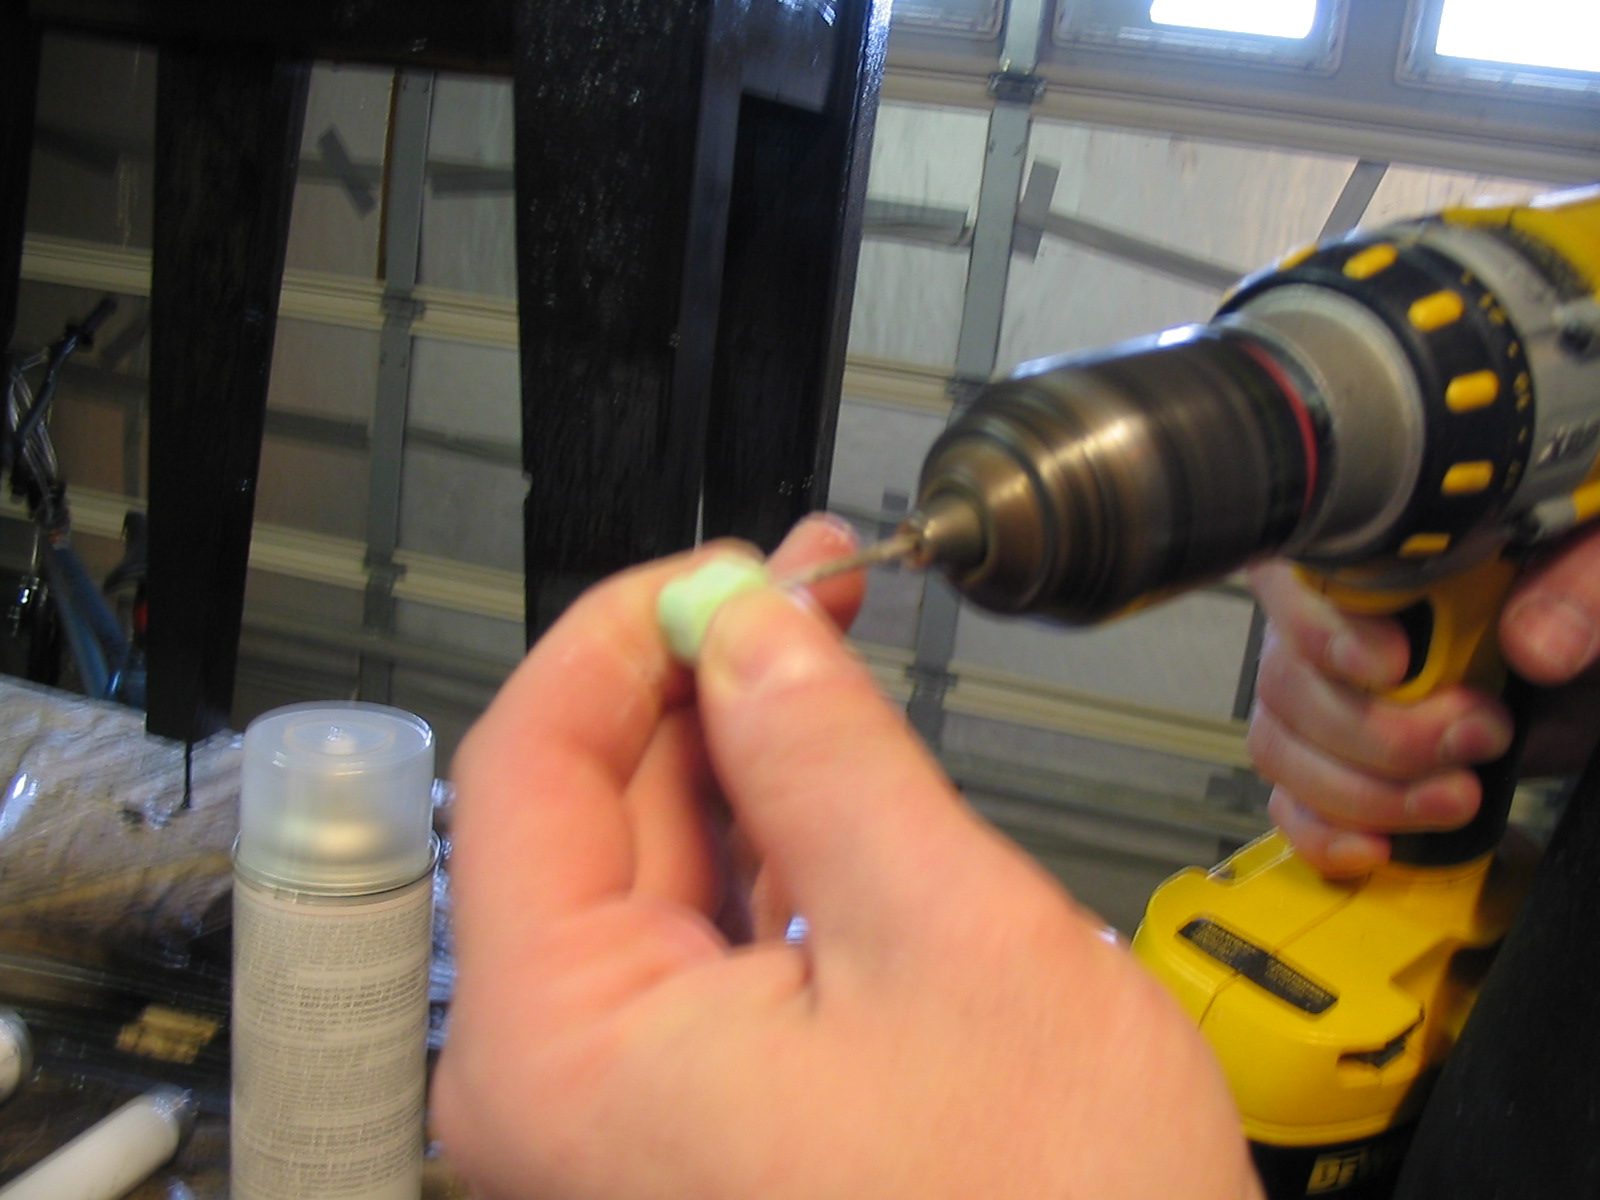
First, Rob used a 1/16 drill bit and drilled holes in our hearts.....awwwwwww, Rob.  He put holes in our hearts!  You'll want to do them through the side for necklaces and bracelets, and through the middle for the hoop earrings, and top through the bottom for the dangly earrings.


Spray them with Mod Podge and let them dry.  Luckily for the impatient such as me, it doesn't take long to dry.

Now you can begin the fun part!  Measure out your length with the stretchy cord for the necklace and bracelets.  This is great that you can just measure and cut so you can customize them according to your desired length and fit.  Then, you guessed it, begin threading the stretchy wire through the hearts.  I alternated colors myself but I guess you could stick to a particular them if you want.  Simply fill the cord to your desired coverage.  I chose to go collar to collar basically but you can go all the way around if you'd like.  Or you can just choose to do a few in front.


When we tied the knots we had to put a drop of hot glue from the glue gun to secure it because it kept wanting to slide out.  This sort of melted the stretchy wire so it didn't slide.  Then we put the crimp beads clamps on and clamped them down with pliers.  It felt secure after that.


We did two different typed of earrings.  The loops were the easiest.  Use the conversation hearts with the holes drilled through the middle for the hoops.  We decided to use one of each of the same color.  It doesn't have to match if you want some variety, why not?  And if you want to give the as a gift, why not include one set of each color so the recipient can interchange them?  How fun is THAT??!!


For the dangly earrings, use the conversation hearts with the holes drilled through the top.  We decided to use two on each, but use however many you'd like.  Use the metallic wire to twine through the loop on the base.  Use the crimp beads clamps to secure the loop through the earring base.  Slide the conversation hearts onto the wire, then secure the bottom by folding the wire inward and again securing with the crimp bead clamps.

I can't wait to wear my confectionary conversational bling!!  But don't chew on them on the swing set or anywhere else since they're coated in varnish, eww!

OH!  And one more really cool thing Trinidy though of was to use the plastic cover off the spools for a cuff bracelet!  How cute was this?!  She simply glued some conversation hearts around the edge and....BINGO!  Or, BAZINGA in her words....she's a big "Big Bang Theory" fan. :)


Go Trin!!

It's always more fun when you can do-it-yourself!!

I love all of my friends and family and they all wear my heart on a string.  ;)

Happy DIY'ing everyone!
-Amy the DIY Monkey

Sunday, January 22, 2012

Super Easy Beef Stroganoff Recipe

Here's another super easy comfort food recipe.  I mean, this couldn't BE any easier.  This recipe is nothing more that just dumping three ingredients into a pot and boiling a bag of egg noodles. 

This recipe is perfect for weeknights when you don't feel like cooking but don't feel like going out either.  It takes no more than how long it takes to boil the noodles. 

For no more than what it takes to make it, it's really good!  No, it's not going to be as if you cooked a roast all day in the crock pot, chopped up fresh mushrooms, used fresh cream, etc.  But it's a satisfying and comforting quick and easy meal.

What you'll need:
1 bag of egg noodles
1 can of roast beef and gravy (usually in the canned meats aisle near the tuna and canned chili, etc.)
1 can cream of mushroom soup
1 small container of sour cream
salt and pepper to taste


Boil egg noodles in a pot
In a separate pot empty can of canned roast beef and gravy, turn on medium heat


Break up pieces to shredded consistency


Add can of cream of mushroom soup, stir to heat together


Heat to almost boiling

Add a few "dollops" of sour cream to taste (about 3), you know what a dollop is, a large heaping spoonful...
--Luckily this is not an exact science and that is the beauty of this recipe!  It really just depends on how creamy you want it to be.


Stir and heat together to almost boiling
Add salt and pepper to taste

When noodles are done, drain water

You can either stir the noodles and the sauce together or top the sauce onto the noodles.  We normally top the noodles but this time stirred them together.  It was tiny bit dry when we did this and reheating was somewhat dry.  So if you like to mix your pastas with sauces, you might add one more can of the cream of mushroom soup or a few more "dollops" of sour cream.


I served mine with carrots, corn, applesauce, and salad.  It as a nice quick wintertime meal.


Oh, and I totally made this recipe up myself so don't expect Paula Deen or Martha Stewart quality fancy stuff.  No kidding, this is just a quick and easy, get something on the table kind of meal.  My husband and I think it's pretty good.  Hope you like it too!

P.S.  After reading this aloud to my husband, he says "I think it's more than just pretty good, I really like it!".  Just FYI. 

Happy DIY'ing everyone!
-Amy the DIY Monkey

Saturday, January 21, 2012

Delicious Potato Soup Recipe

In my continuing coverage of winter time "comfort foods", I'd like to offer you one of my favorite dishes for a cold night.  My dad taught me how to make his wonderful potato soup years ago and recently shared with me that you can add sausage to it, similar to that of my all-time favorite Zuppa Toscana at the Olive Garden. 


If you're vegetarian, you can certainly omit the sausage and just boil the veggies together then drain and add the butter and milk, but if you are including the sausage, I recommend sauteing your sausage, onions, and potatoes together first, then adding to the other boiling veggies.


I also have begun to omit peeling the potatoes and leaving on the skins.  You get more vitamins that way and it's more hearty!  Also, it takes a lot less time if you don't have to peel all of those 'taters!

It's a pretty basic recipe, you'll need:
3-4 large russet potatoes (the regular brown kind)
about 5 fresh celery stalks
about 4-5 fresh carrot sticks
1 small yellow or white onion
1 pack of sausage (either the breakfast kind or Italian, but not maple or brown sugar flavored)
about 3/4 gallon of vitamin D (whole) milk (you can use 2% if you want to cut back a few calories, but it's much better with whole milk)
1 stick of butter (you can use margarine, but again it's tastier with real butter, so do Paula Deen proud and go on and use a whole stick of butter)

Brown and crumble sausage in a large skillet, while boiling pot of water
Chop potatoes and onion and add to half-cooked sausage to simmer in grease, stirring frequently to saute

Chop celery and carrots into 1/4-1/2 inch pieces, add to boiling water

Continue to boil until carrots and celery can be cut into easily with a knife, use spoon to remove a piece and test, should be almost cooked but left a little snappy, about 15-20 minutes
                                    
Add fully cooked sausage with simmering potatoes to boiling carrots and celery to continue cooking potatoes, do not drain grease, most will have absorbed into potatoes or will drain out with water later

Boil about 15 more minutes, test veggies with spoon and knife, when knife easily cuts into each piece, this is a matter of preference also, we like ours with just a little bit of "snap" left in the veggies but you might like yours completely "mushy",  drain water (this will remove any of the excessive grease)
Return pot to stove and add one stick of butter, stir until melted
                                    
Fill the rest of the pot with milk
Add salt and pepper to taste, heat to boiling stirring frequently

Use mostly medium heat for everything, adjusting as necessary

I serve mine with canned croissants. 

This soup stores and reheats very well.  In fact it is another one of those "next dayers".  I'm getting ready to heat some up for lunch right now!

Oh, and by the way.  I'm getting used to cooking with a camera beside me!  I'm going to have to start keeping it in my utensil drawer.

If you try this recipe, please let me know what you think.  If you have some other potato soup ideas, please share them with me!

Happy DIY'ing everyone!
-Amy the DIY Monkey