My husband and I are enjoying our first Christmas in our newly-built home. Being a crafty-girl and a party-girl, I couldn't wait to make our first Christmas memories with some great friends, fun crafts, delicious recipes, and a fun party! I think I was able to accomplish them all!
Friday night was "craft night" with some friends. Until we have children, one of our spare bedrooms is going to be my "craft room". However, we decided to do our crafts downstairs so that we could enjoy a little traditional Christmas movies while making our creations. Luckily, my kitchen, nook, and family room are all open to each other so it was perfect! I also really appreciated the electric kitchen island, perfect for glue guns!

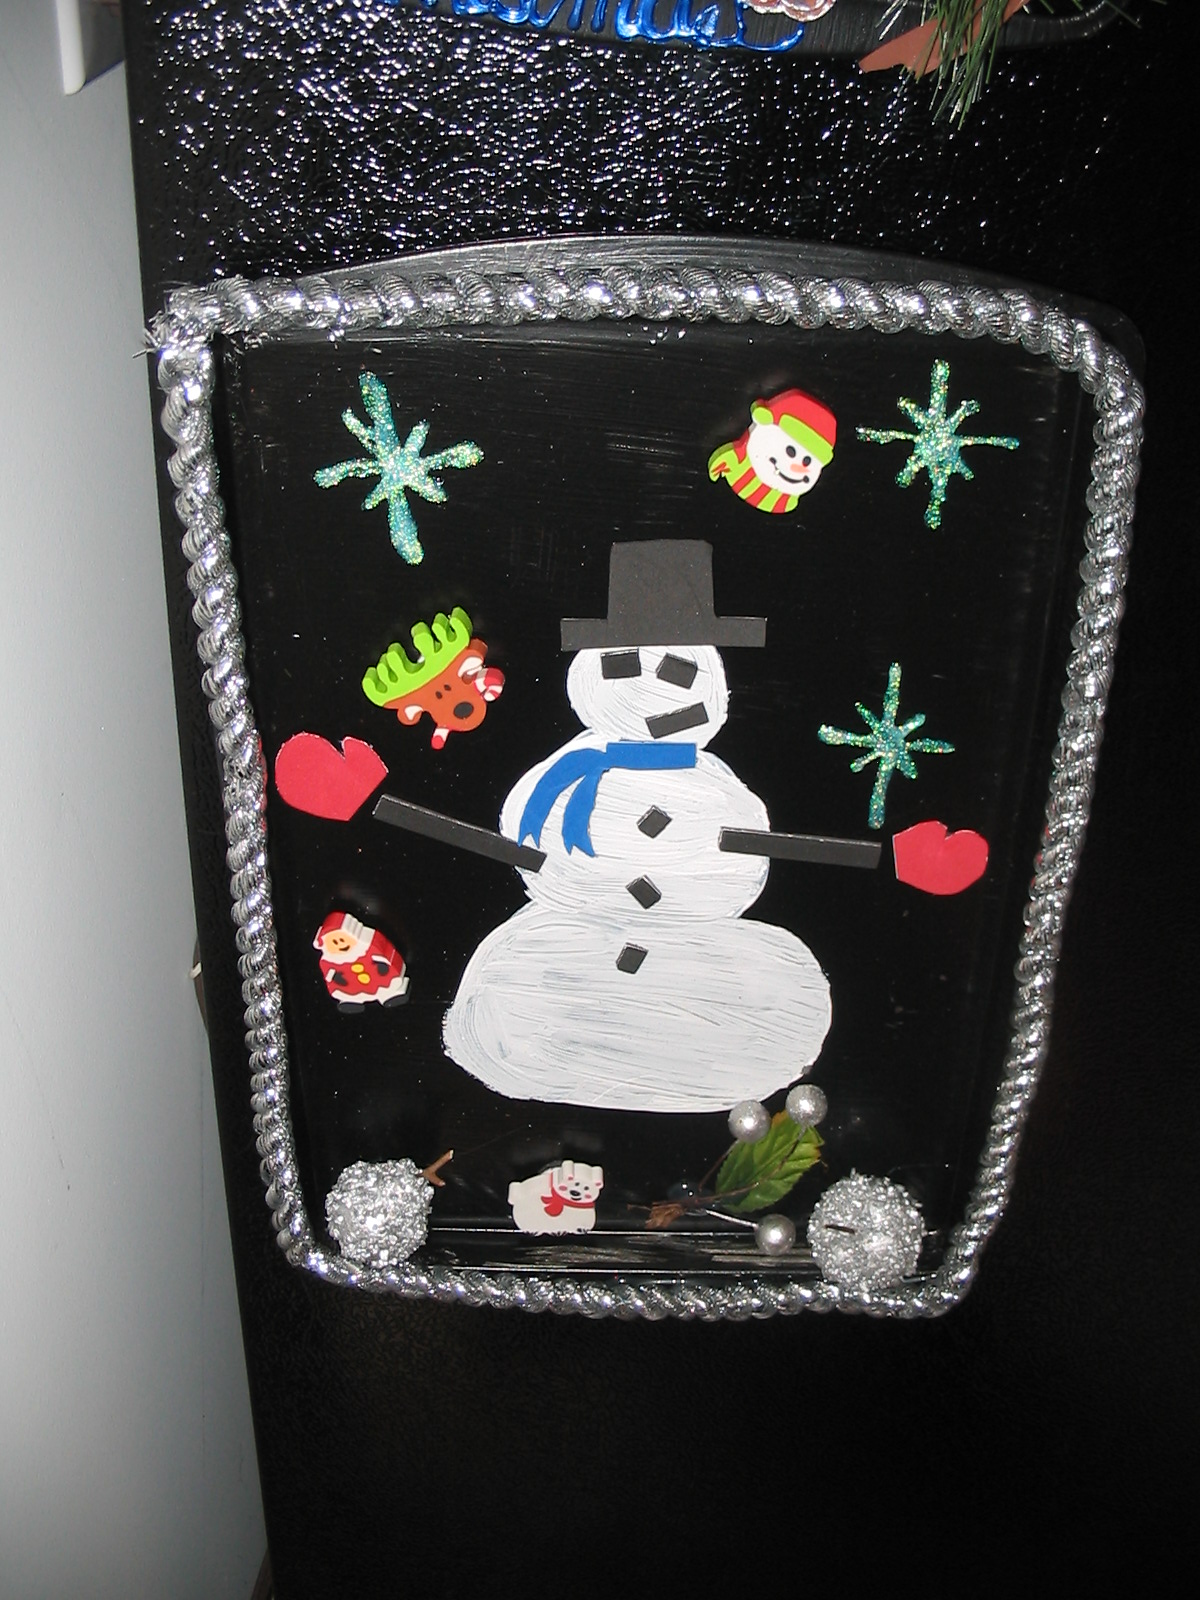
I decided to create cookie sheet chalkboards that can be hung on refrigerators and can hold magnets. I think these might make some cute Christmas gifts. I've seen these a few places and like that you can decorate them many ways and that they are a practical decoration as well. You can write on them with chalk and use magnets on them. This can take the boring out of "we need milk" when you get to write it on your own super fun decorative chalkboard!
I decided that one one of the chalkboards, I'd paint a snowman then I could make magnets for the hat, gloves, buttons, etc. This way you can "decorate" the snowman with the magnets.
On one of the other chalkboards, I thought it might be cute to paint on a Christmas tree where the ornaments are the magnets. This would allow you to "decorate" the Christmas tree too!

I made the magnets from some Christmas erasers I found at The Dollar Tree. They're Santa heads and reindeer heads, and I think some snowflakes in there too. So my chalkboards have lots of little Santa heads floating around on them, but it did turn out cute.


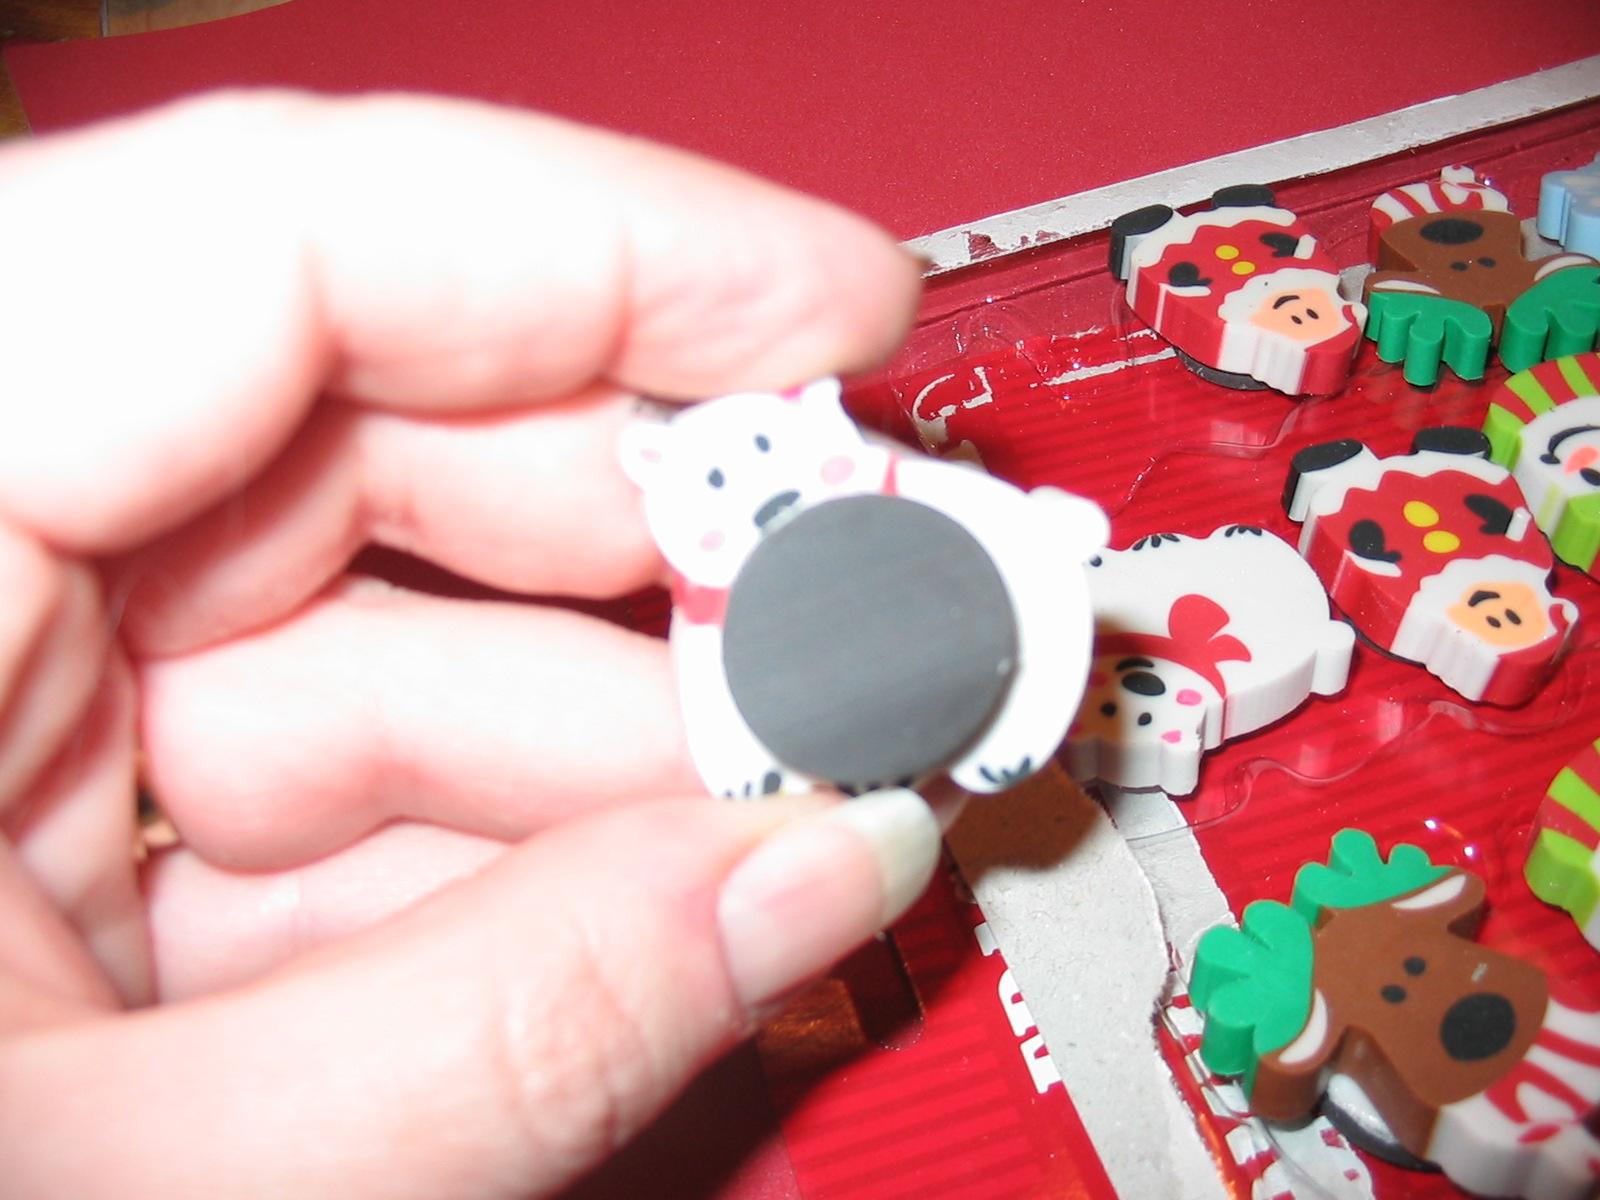
I also bought some art foam at Wal-Mart to cut out different things. I used this to make the snowman top hat and gloves, etc


The last one I just decided a "Santa's List" would be cute. Then one could use it as a festive grocery list or phone number list....list of things to do..whatever! It just popped into my head when I was standing there staring at the last blank cookie sheet at 2 in the morning, and was determined to decorate them all!
I ffinalized a few of them with some silver and gold cords, pine cone thingies, and just some various little things I found at The Dollar Tree that I thought might look good glued to a cookie sheet! This is the part I enjoy because you can just eyeball what you find that's within your budget and think of ways to use it.
Where did I get my supplies?
I went to two places to gather supplies, The Dollar Tree (this is one of those "everything is $1 stores, if you don't have a Dollar Tree in your area, you probably have some sort of $1 store). There I gathered whatever "dimensional embellishments" I could at $1 each.
I also found some acrylic paint and brushes here. I would recommend getting something larger than this little row of paint wells, however. I ended up using some of my friend's paint. But again, that's what's so great about crafting together, other than the fun, is getting to share each other's stuff!
I also found cookie sheets at The Dollar Tree, but they were pretty small. The next time I make these, I may spring for larger sheets.
The I went to Wal-Mart for the chalkboard paint, magnets, and for the "decoration" accessory magnets.
Supplies and cost:
 |
| Cookie Sheet, $1 each at The Dollar Tree |
 |
| Chalkboard Paint, $3.97 at Wal-Mart |
 |
| Chalk, $.96 at Wal-Mart |
 |
| Magnets, $1.97 for 18 adhesive backed discs, and $1.97 for adhesive backed strips, at Wal-Mart |
 |
| Paint, $1 at The Dollar Tree |
 |
| Various seasonal and decorative "embellishments, $1 each at The Dollar Tree |
 |
| More Dollar Tree embellishments..... |
 |
| Paint brushes, $1 at the Dollar Tree also, but you'll need a wider brush for the chalkboard paint, I already had that on-hand |
|
| Art Foam, $3.47 at Wal-Mart, and I still have tons left for other projects |
|
| Christmas erasers, $1 at The Dollar Tree, made the "floating head" magnets! They were the perfect size for the pre-cut magnet disks too |
Any troubleshooting?
When I get together with my friends to make crafts, I want something that is easy and doesn't require a lot of materials. Who wants to spend a lot of time running around getting what they need to make what they're going to make? And who wants to take time out from your girl-time to stop and go get supplies? It's best to have it all on hand and ready to go so you can just enjoy the fun and the company.
Having said this, I learned a lesson with this one that I think is important to share. Get your cookie sheets and paint them with the chalkboard paint a couple of days BEFORE you plan to decorate them. They take a while to dry and if you are like me, you're impatient and want to jump to the fun stuff when you're with your friends.
The chalkboard paint, found in the craft aisle at Wal-Mart, not in the hardware paint section, recommends 2 coats. They recommend an hour of drying time in between the two coats, AND 24 hours of curing time after the second coat!
I couldn't wait to begin the fun part and began to place magnets on the paint because it felt dry to the touch. Well, now I have to go back and repair the chips that occurred when I removed the magnets only to find the paint stuck to the magnet back and hole in the paint where silver cookie sheet is peeking through!


Another pitfall to avoid is to make sure you secure the backs of the cookies sheets with an ample amount of Domagnets if you plan to hang them on the refrigerator this way. Do not rely on the adhesive backing to secure the back of the cookie sheet to the refigerator. You must glue them on with a glue gun. The added decorations will add much weight to the sheet and if not properly secured...BAM! They fall to the floor and there you are repairing again. Yes....I was again impatient and overlooked this vital step. I'll be spending some time today repairing.... :(
Needless to say, I'm more about thinking of the ideas and making variations on them. I'm not so much a very good engineer of the mechanics of it all. So assuming there's someone out there that's like me, these are some things for you to consider.
This was lots of fun and I'm left with enough paint for at least one more cookie sheet. I am left with quite a bit of other supplies and embellishments such as magnets and foam. Perhaps my refrigerator will need some cupids and hearts soon then?????
Happy DIY'ing everyone!!! And Merry Christmas!!! Happy holidays!!!!
No comments:
Post a Comment