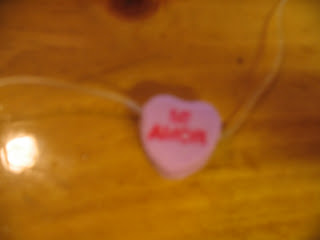
Making conversation heart jewelry proved to be a fun, inexpensive, and cute do-it-yourself craft with little preliminary set up work. It was easy to find the supplies, and left had plenty of left over supplies for future craft ideas, or gives you enough to do many sets. So far I have no breaks or mishaps to have to fix later.
We made conversation heart necklaces, bracelets, and two kinds of earrings!

I never liked the taste of conversation hearts, but love the way they look. I was, however, a fan of the candy necklaces and bracelets I used to get when I was a kid. Nothing beat getting a candy necklace and getting on swing set chewin' on your necklace and not having to use any hands! You could swing hard and hands-free while enjoying some candy!! Awesome. Plus the cool pastel colors looked pretty.
Well, you won't want to eat these candies because they're sprayed with a varnish. Hey, you don't want them to melt on your neck do you?
This is a fun craft that requires little preparation before the fun stuff......well that is if you have your friend's husband nice enough to drill the holes in the conversation hearts for you and spray them with Mod Podge so all you have to do is thread things and put them together! Thanks, Robbie!!!!
It's so easy, all you need is:
A bag or two of conversation hearts (we used Brach's and they stayed together well while drilling, about $3)
Can of Mod Podge (found at Wal Mart in the craft aisle, about $5.97)
Various jewelry making supplies, (also at Wal Mart in the craft aisle, around $2 each)
-stretchy clear cord (in a spool)
-silver beading wire thread (also on a spool)
-earring hoops
-fish hook earring wire
-crimp beads clamps
This was entirely a group effort with my friend Beth who knew about jewelry making and helped me choose the supplies I needed. Trinidy had lots of great ideas, such as figuring out that we should drill the holes in the conversation hearts BEFORE spraying them with Mod Podge so that the seal on the inside too. Well, actually it was HER idea to spray them anyway! So when you get caught in the rain and maybe your jewelry doesn't melt, you can thank her! And of course Trin's husband Rob for doing the drilling and spraying.
What did I do you might ask? Well......I had fun! And I came up with the conversation heart jewelry and apologize in advance if it doesn't work out too well. I have only had mine for a day and haven't worn them yet......but since you're not going to wear them year-round I'm hoping it will last enough to enjoy them for Valentine's Day!
First, Rob used a 1/16 drill bit and drilled holes in our hearts.....awwwwwww, Rob. He put holes in our hearts! You'll want to do them through the side for necklaces and bracelets, and through the middle for the hoop earrings, and top through the bottom for the dangly earrings.
Spray them with Mod Podge and let them dry. Luckily for the impatient such as me, it doesn't take long to dry.
Now you can begin the fun part! Measure out your length with the stretchy cord for the necklace and bracelets. This is great that you can just measure and cut so you can customize them according to your desired length and fit. Then, you guessed it, begin threading the stretchy wire through the hearts. I alternated colors myself but I guess you could stick to a particular them if you want. Simply fill the cord to your desired coverage. I chose to go collar to collar basically but you can go all the way around if you'd like. Or you can just choose to do a few in front.
When we tied the knots we had to put a drop of hot glue from the glue gun to secure it because it kept wanting to slide out. This sort of melted the stretchy wire so it didn't slide. Then we put the crimp beads clamps on and clamped them down with pliers. It felt secure after that.
We did two different typed of earrings. The loops were the easiest. Use the conversation hearts with the holes drilled through the middle for the hoops. We decided to use one of each of the same color. It doesn't have to match if you want some variety, why not? And if you want to give the as a gift, why not include one set of each color so the recipient can interchange them? How fun is THAT??!!
For the dangly earrings, use the conversation hearts with the holes drilled through the top. We decided to use two on each, but use however many you'd like. Use the metallic wire to twine through the loop on the base. Use the crimp beads clamps to secure the loop through the earring base. Slide the conversation hearts onto the wire, then secure the bottom by folding the wire inward and again securing with the crimp bead clamps.
I can't wait to wear my confectionary conversational bling!! But don't chew on them on the swing set or anywhere else since they're coated in varnish, eww!
OH! And one more really cool thing Trinidy though of was to use the plastic cover off the spools for a cuff bracelet! How cute was this?! She simply glued some conversation hearts around the edge and....BINGO! Or, BAZINGA in her words....she's a big "Big Bang Theory" fan. :)
Go Trin!!
It's always more fun when you can do-it-yourself!!
I love all of my friends and family and they all wear my heart on a string. ;)
Happy DIY'ing everyone!
-Amy the DIY Monkey


No comments:
Post a Comment